今回は、「ラジオボタン」を SwiftUI で作ってみたので紹介します。
Web 制作ではよくある表示物ですが、チェックボックスと同様に iOS 標準では存在しないコントロールです。
通常、iOS で選択肢から単一選択をする場合は、Picker(UIPickerView、UISegmentedControl) を使うことになり、チェックボックスも Toggle(UISwitch)で代用できます。
特段デザインにこだわりがないのであれば、大人しく Apple 様の意向に沿ったデザインにしておきましょう。
とは言うものの、アンケート的な画面などのデザインでは使えそうなので、これまで SwiftUI を勉強してきた腕試しがてら作ってみることにしました。
【SwiftUI】ラジオボタンを作ってみた
イニシャライザー
RadioButton(selectedIndex: Binding<Int>, axis: RadioButton.Axis, texts: [String])引数は3つです。
- selectedIndex: Binding<Int> バインディングさせる @State(or @Publish)変数を渡します。
- axis: Axis ボタンの並ぶ方向を .horizontal(水平方向)または .vertical(垂直方向)で指定します。
- texts: [String] ボタンに設定する文字列を配列で渡します。要素数がそのままボタンの数となります。
RadioButton 全体コード
struct RadioButtonModel: Identifiable, Hashable {
    let id = UUID()
    let index: Int
    let text: String

    init(index: Int, text: String) {
        self.index = index
        self.text = text
    }
}

struct RadioButton: View {

    enum Axis {
        case horizontal
        case vertical
    }

    @Binding var selectedIndex: Int
    private let axis: Axis
    private var models: [RadioButtonModel] = []

    init(selectedIndex: Binding<Int>, axis: Axis, texts: [String]) {
        self._selectedIndex = selectedIndex
        self.axis = axis

        var index = 0
        texts.forEach { text in
            let model = RadioButtonModel(index: index, text: text)
            models.append(model)
            index += 1
        }
    }

    var body: some View {
        if axis == .vertical {
            return configureVertical()
        } else {
            return configureHorizontal()
        }
    }

    private func configureHorizontal() -> AnyView {
        return AnyView(
            HStack {
                configure()
            }
        )
    }

    private func configureVertical() -> AnyView {
        return AnyView(
            VStack(alignment: .leading) {
                configure()
            }
        )
    }

    private func configure() -> AnyView {
        return AnyView(
            ForEach(models) { model in
                HStack {
                    if model.index == self.selectedIndex {
                        ZStack {
                            Circle()
                                .stroke(Color.accentColor, style: StrokeStyle(lineWidth: 2))
                                .frame(width: 20, height: 20)
                            Circle()
                                .fill(Color.accentColor)
                                .frame(width: 12, height: 12)
                        }
                    } else {
                        Circle()
                            .stroke(Color.gray, style: StrokeStyle(lineWidth: 2))
                            .frame(width: 20, height: 20)
                    }
                    Text(model.text)
                }
                .onTapGesture {
                    self._selectedIndex.wrappedValue = model.index
                }
            }
        )
    }
}
ラジオボタン単体のデータは、index と 文字列を持たせたかったため、RadioButtonModel 構造体として定義し、渡された文字列の要素数分の Model を保持します。
ボタンのデザインは画像でも良かったのですが、今回は Circle と ZStack を使って表現しています。
選択中の表現
縁のみの円の上に、それよりも少し小さい塗り潰した円を重ねています。
ZStack {
    Circle()
        .stroke(Color.accentColor, style: StrokeStyle(lineWidth: 2))
        .frame(width: 20, height: 20)
    Circle()
        .fill(Color.accentColor)
        .frame(width: 12, height: 12)
}
非選択中の表現
縁をグレーにした円です。
Circle()
    .stroke(Color.gray, style: StrokeStyle(lineWidth: 2))
    .frame(width: 20, height: 20)
使用例
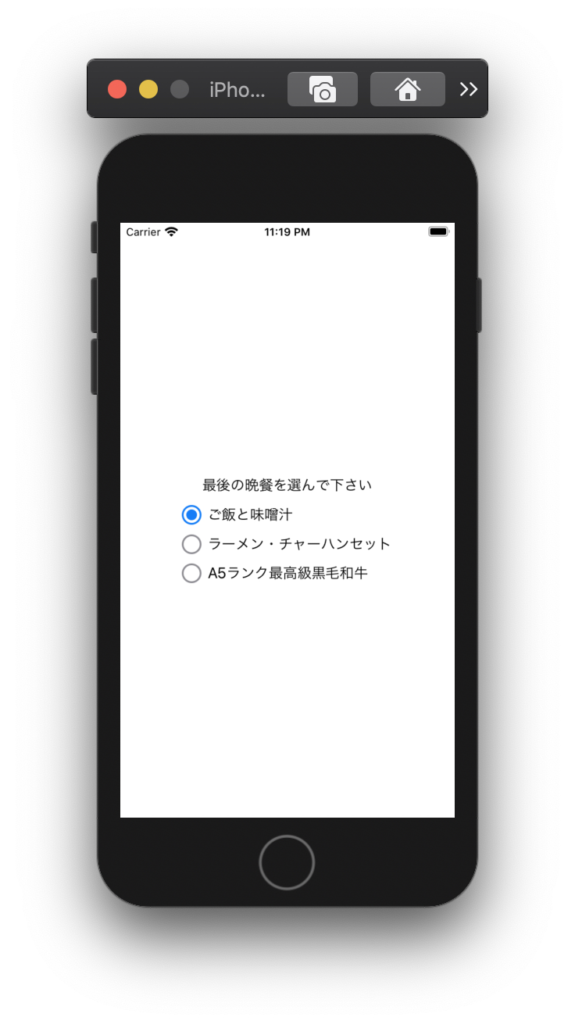
冒頭サンプル画像の使用例です。
struct ContentView: View {

    @State private var selectedIndex = 0
    let texts = ["ご飯と味噌汁", "ラーメン・チャーハンセット", "A5ランク最高級黒毛和牛"]

    var body: some View {
        VStack {
            Spacer()
            Text("最後の晩餐を選んで下さい")
            RadioButton(selectedIndex: $selectedIndex, axis: .vertical, texts: texts)
            Spacer()
        }
    }
}
以上、ラジオボタンを紹介しました。
作り方は色々あると思いますのでご参考までに。
以下の参考記事も是非ご覧ください。


コメントを残す