@State や @Published の変化を検知して何らかのアクションを取りたい場合があると思います。
そのような時は、SwiftUI 2.0 から導入された onChange を利用すると便利です。
プロパティの変更を検知する方法【onChange】
定義は以下のようになっています。
onChange(of value: Equatable, perform action: (Equatable) -> Void)) -> Viewof: には検知したいプロパティを指定し、perform: には行いたいアクション(クロージャ)を定義します。
使用例を2つ紹介します。
例1)TextEditor の入力文字数に制限を掛ける
struct ContentView: View {

    @State var currentText = ""
    let maxTextLength = 15

    var body: some View {
        VStack {
            Spacer(minLength: 32)
            Text("入力文字数:\(currentText.count)")
            TextEditor(text: $currentText)
                .onChange(of: currentText) { value in
                    if value.count > maxTextLength {
                        currentText.removeLast(currentText.count - maxTextLength)
                    }
                }
            Spacer(minLength: 32)
        }
    }
}
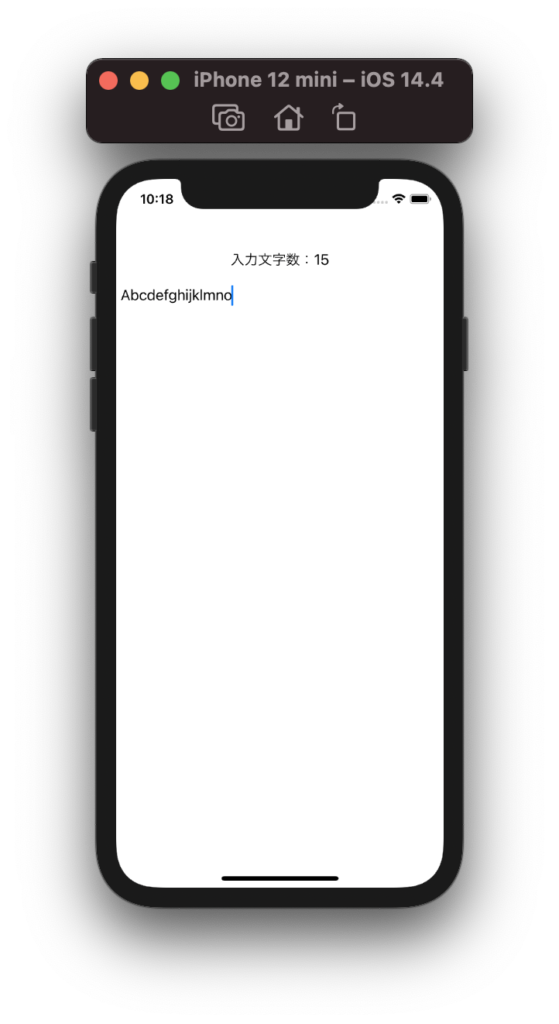
TextEditor に対して onChange を定義し、現在の文字数が15文字を超えていたら丸め込む処理をしています。
例2)Timer でカウンタを監視して 0 になったら前の画面へ戻る
struct ContentView: View {

    @State var showTimerView = false

    var body: some View {
        NavigationView {
            VStack {
                Text("Content View")
                NavigationLink(destination: TimerView(active: $showTimerView), isActive: $showTimerView) {
                    Text("Show Timer View")
                }
            }
        }
    }
}

struct TimerView: View {

    @State var counter = 5
    @Binding var active: Bool

    var body: some View {
        VStack {
            Text("Timer View")
            Text("Timer Count: \(counter)")
                .onChange(of: counter) { value in
                    if value == 0 {
                        active = false
                    }
                }
        }
        .onAppear() {
            Timer.scheduledTimer(withTimeInterval: 1.0, repeats: true) { timer in
                self.counter -= 1
                if self.counter == 0 {
                    timer.invalidate()
                }
            }
        }
    }
}
画面遷移後にタイマーを起動し、Text で定義した onChange で counter が 0 になっていたら予め受け取っている active を false にして前の画面へ戻ります。
以上



コメントを残す